DIY Plywood Desk with 1 Sheet of Plywood
We all love a good DIY project! And what better project than a simple DIY plywood desk. I don't want to bore you with a super long intro, but to make it short and sweet, this desk was built from just 1 sheet of plywood! We used a handful of tools, but you really could get away with using less.
We have a full set of plans with a cut list and assembly list here: https://www.woodbrew.tv/store/p/diy-modern-plywood-desk-plans-using-1-sheet-of-plywood
If you're interested in the tools that we use you can check out this blog post or our Amazon store!
Cut Plywood Down to Width and Length

Starting with a circular saw, we cut down the plywood to the size of the desk top and bottom. This is going to make it easier to manage the rest of the plywood at the table saw, but now we have those pieces done. Feel free to keep going with a circular saw.
Let's talk pieces real quick. We are going to need a desk top and desk bottom, both the same. Then, we will need 6 different size strips, four sizes for the legs, and two sizes for the cubbies inside the desk.
Once all those pieces were cut to width, we moved to the miter saw to cut them to length. Now, the desk top and bottom are too big for the miter saw, so we did that on the table saw as well.
Drill Pocket Holes

We need pocket holes drilled into all the pieces that will be a part of the cubbies. We did 3 down the length of all of them and only on one side. These will get attached to the underside of the desk top. Here's our pocket hole jig: https://amzn.to/3hMffJG (affiliate link)
Cut Out Computer Cord Slot

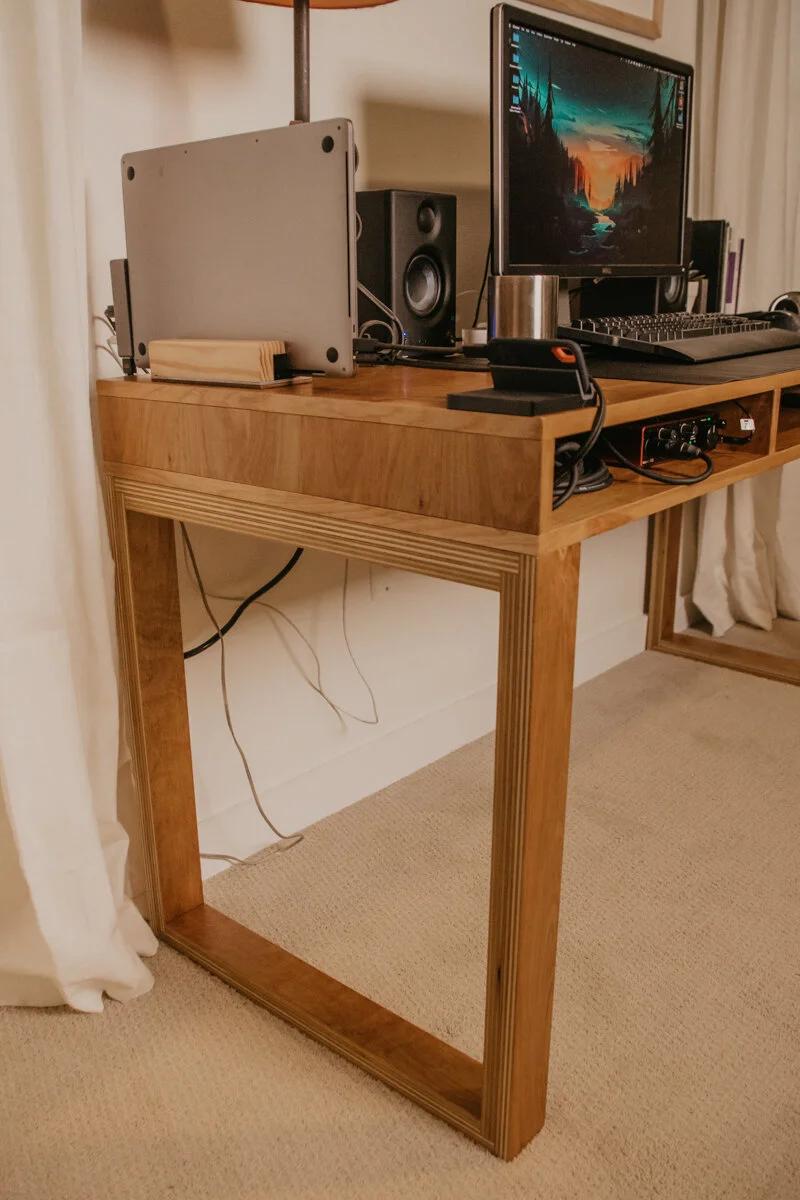
We are going to have a computer monitor up on the desk, so we made a rounded cut out with a jigsaw for a power strip to sit right below the desk top on the desk bottom. Even with the power strip there we can tuck away all the cords around it!
To knock down the edge we used a 1/4" round-over bit from Bits&Bits. It's such a tiny detail but makes a world of a difference. No cords getting cut up here! You can use the code "WOODBREW15" to get 15% off your order over on the Bit&Bits website: https://bitsbits.com/ref/6206/ These bits are truly the best we've ever used and hardly ever get burned wood due to the Astra coating on the carbide blades. Check them out!
Assembly
We are going to start the assembly process here, but finish it later. We need to add our finish on before we close it all up. Firstly, go ahead and sand everything now!

For the desk, there are cubbies, but they don't go all the way to the back of the desk. They stop a few inches in so cords can get neatly put away into the desk and it'll be separate from the main cubbies, A.K.A. no cords showing! (some are actually shown in the final photos, oops!) This also gives the desk a lot of support throughout the top.
So, with the desk top facing down we can pocket hole screw down the sides of the desk and the cubby dividers, all the cubbies are equally spaced. We ended up pocket holing horizontally the back pieces together for extra strength.

For the legs, we laid down the longer piece with the shorter piece on top with glue in between and pin nailed down. We have two different sizes of legs when they are all paired together. You should end up with 8 pairings, 4 of each size. The longer ones are for the actual legs, and the shorter ones are the cross pieces on top and bottom. We clamped those together and let them dry for a few hours. Then we screwed them together to create the base with powerhead screws.
Applying Finish
Before we apply finish, we actually put edge banding on. This is totally personal preference and we usually don't do this with our projects. We love the exposed plywood edge too! Here all the supplies you need for edge banding
(affiliate links)
Trimmer: https://amzn.to/2YNKKeH
Speed Roller: https://amzn.to/32F7puY
Dual Edge Sander: https://amzn.to/3hMqRfN
Flush Cut Trimmers: https://amzn.to/34RGwXE
Edge Banding: https://amzn.to/34MgC7z (couldn't find a peel and stick edge banding on Amazon, but this kind you iron on)

NOW, let's put on our finish while everything is still apart. We used the Lust varnish from Total Boat. We used the high-gloss Lust first to build up the coating, then finished it off with the matte Lust. This stuff is great because you can reapply another coat in an hour and there is no sanding between coats! So worth checking it out!

Final Assembly

After the finish is dry (I would give it overnight to cure), we can screw together the rest of the desk! Be sure to pre-drill first!
The desk bottom gets screwed into the sides of the desk and the cubby dividers with powerhead screws (https://amzn.to/2O2Fnmu (affiliate link)and use the Flushmount Drill bit to make the screw flush https://amzn.to/32GOTm7(affiliate link) ). The legs are screwed in with the same screws from under the top cross pieces of the legs into the desk bottom.
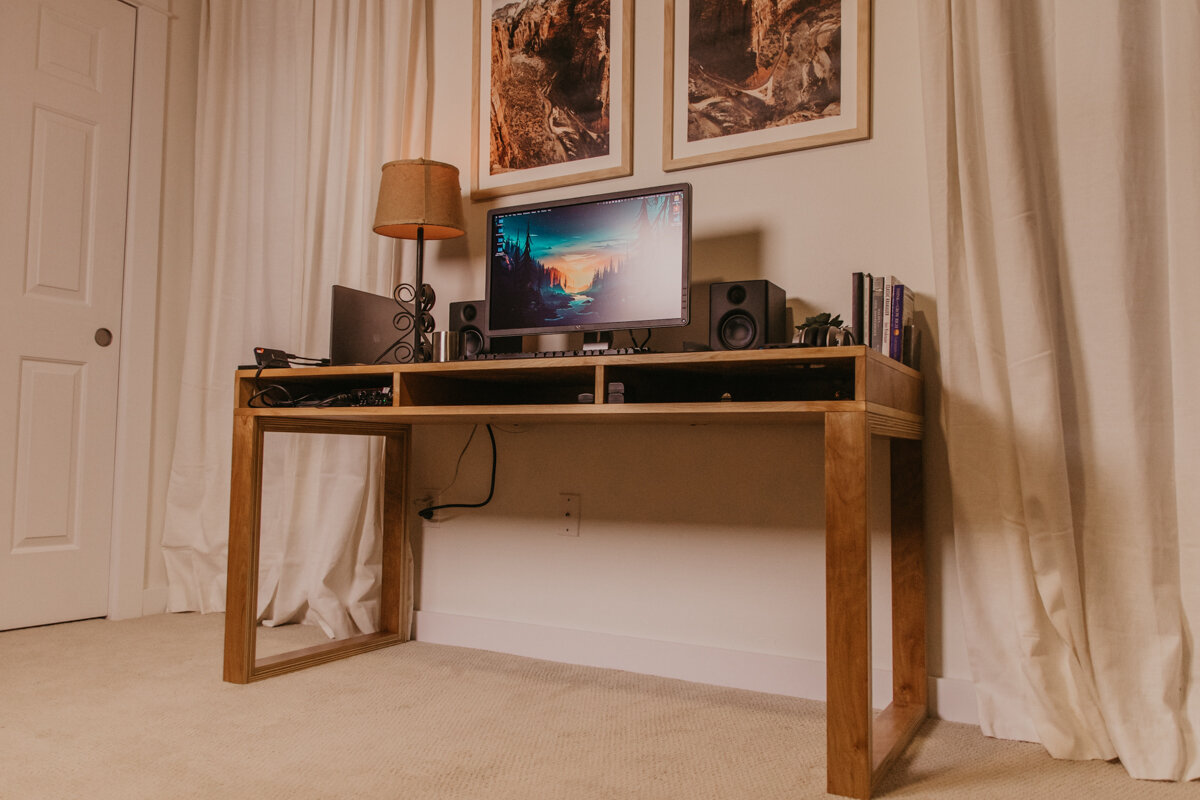
DONE
Move this DIY plywood desk into it's new home and decorate it, my favorite part!