How to Restore Old Rusted Tools
This post is sponsored by WD-40.
Molly and I love going through antique shops because you really never know what you are going to find. We came across a few old rusted axes at a local store and thought they were just too cool not to pass up. We have been watching Zack from ZH Fabrications do a lot of cool stuff with forging recently and he is really what inspired this project.
It was really difficult to separate the axe head from the handle and we had to resort to just cutting the head off the handle. Once cut off, we could punch out the wood and wedge from the backside.

With the head off of the handle it was time to remove years of rust. We used WD-40’s Specialist Rust Remover Soak to save us the headache of trying to scrub or grind the rust off and honestly its just freaking cool to watch. We let this sit for a little over 24 hours, and this is exactly how it came out. All the rust is gone and just some of the original black paint is left.

We want to reshape the head to more of a foresters axe or hatchet style. I am by no means an expert here, so could be wrong on the terminology. I marked my cut line first so I know where to cut.

When you are cutting the axe head you generate a lot of heat which can ruin the blades hardening so you want to make sure you are cooling it off with water pretty frequently.
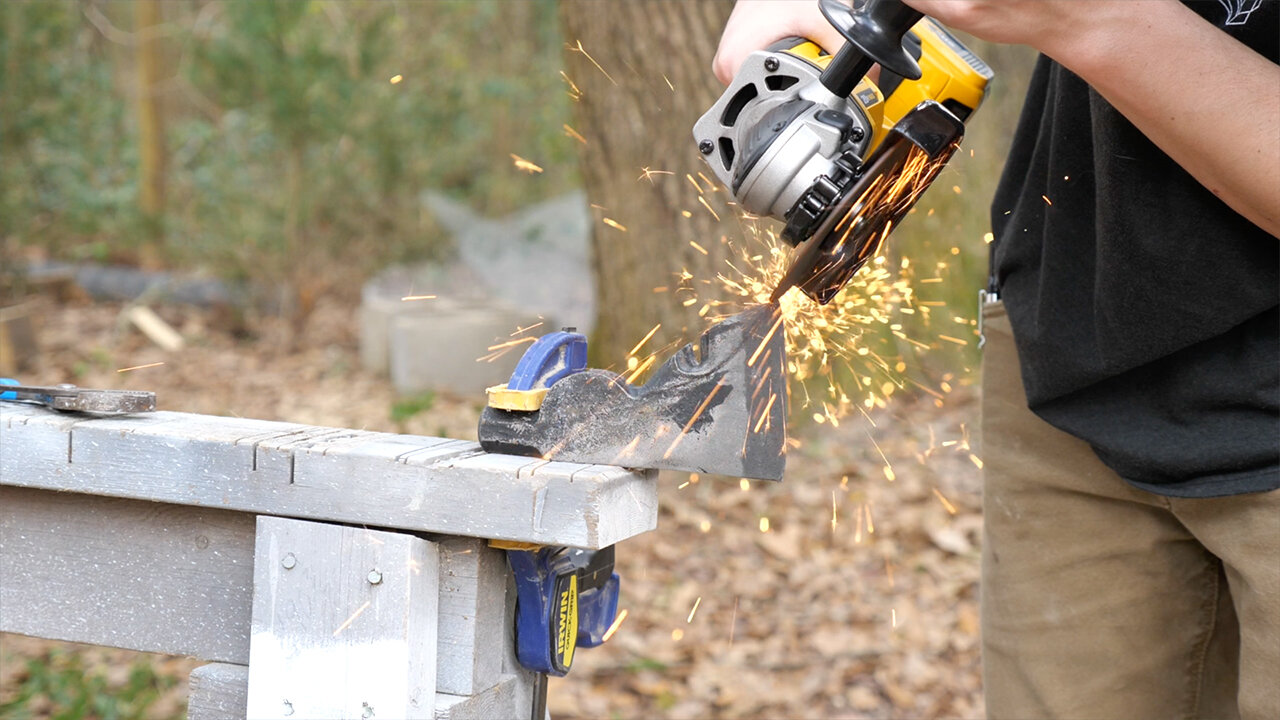
We also wanted to remove the end to make the shape sleeker. Molly hopped in and used the grinder to cut off the end.

After we were done grinding and cutting we could bring it back into the shop and start filing the sharp edges down and honing the shape. When you use a file it only cuts on the push so don’t go back and forth, you can actually damage or dull the file doing this. One motion forward can remove a lot of material and be sure to clean the shavings out of the file every now and then to keep it cutting well.

Once the shape was roughed out with the file I used the belt sander and hand sanding blocks (affiliate link) to remove all of the scratches from the files.

With the shape done it was time to blacken the whole head. We used WD-40’s Specialist Machine & Engine Degreaser Foaming Spray to remove any grime that could interfere with the blackening solution. This spray really penetrates into the small pits and divots on the surface of the metal to ensure a good cleaning.

There will be links below to all of these products, but we simply brushed on a blackening solution (affiliate link) and it blackens the metal. A really good alternative to painting the metal.

Now for the making of a handle. I have never made an axe handle before and did it all wrong at first. I tried shaping the handle from a solid block without drawing a shape out which was a disaster, the wood I chose had the wrong grain direction, and the axe head didn’t seat properly. The first one was a fail.

This new handle works a whole lot better and looks a bit better as well. To start, I used oak and drew the shape of the handle out before starting. I also went with a simpler approach and just used a router for the profile. The wood was quarter sawn which provided a really strong joint with the axe head.

After cutting the shape out with the jig saw (affiliate link), I traced the inside of the axe head on top of the handle and began to widdle away with a combination of hand saws, chisels, and files until the axe head would fit on the end.

Then, I used the belt sander and a router to finalize the shape of the handle.
I flipped the axe upside down and tapped the end of the handle to set the head in place. Then I could drive the wedge from the old handle in place.

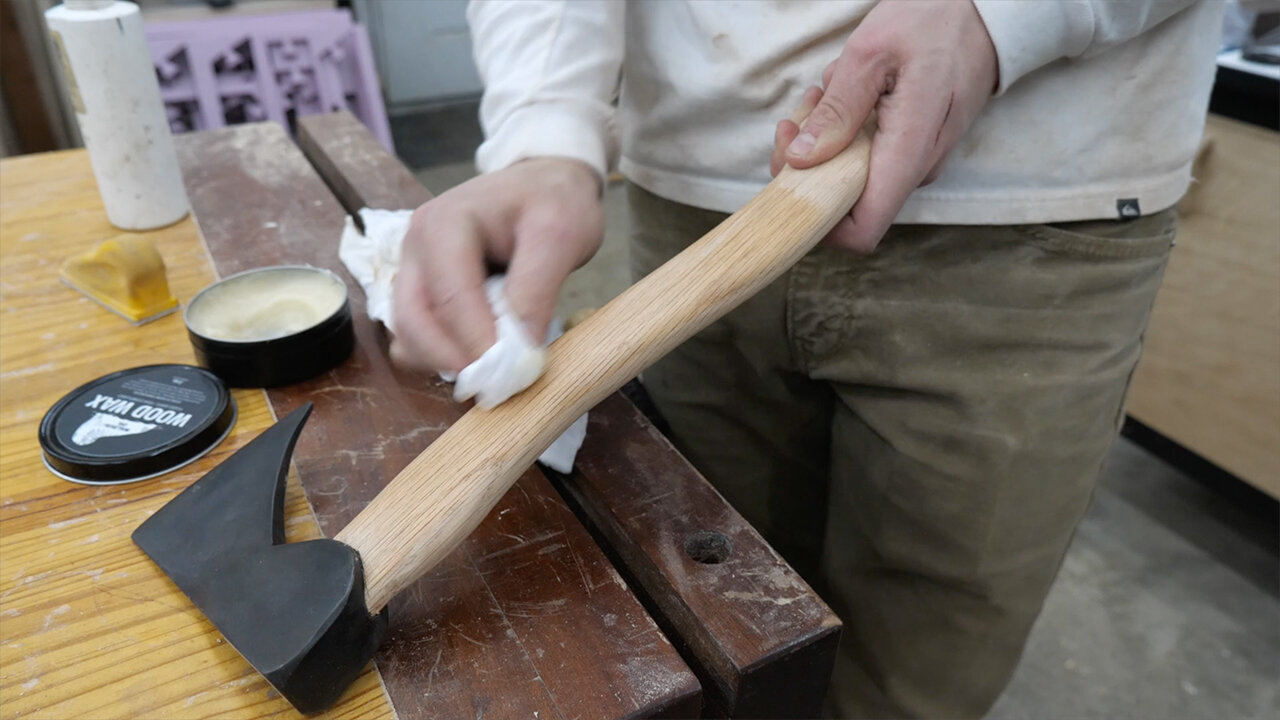
To finish it off I am just applying some wood wax so the wood will feel nice and soft in the hand. The very last thing we did was sharpen the edge of the blade on our diamond sharpening stones with WD-40 Multi-Use Product on top as a lubricant. When you sharpen an axe you want he edge to be slightly rounded to provide a strong edge for the heavy blows it will take.
We really love how this turned out and hope you guys enjoyed this project! Thank you to WD-40 for sponsoring this week's video! Everything we used is linked within this article, so it will take you directly to the product site! Thank you guys for taking the time to read through this and watch the video, we looked forward to seeing you in the next one!

I acknowledge that WD-40 is partnering with me to participate in their campaign. As a part of the campaign, I am receiving compensation in the form of products and services, for the purpose of promoting WD-40. All expressed opinions and experiences are my own words. My post complies with the Word Of Mouth Marketing Association (WOMMA) Ethics Code and applicable Federal Trade Commission guidelines.