LIVE EDGE CHERRY SLAB COFFEE TABLE
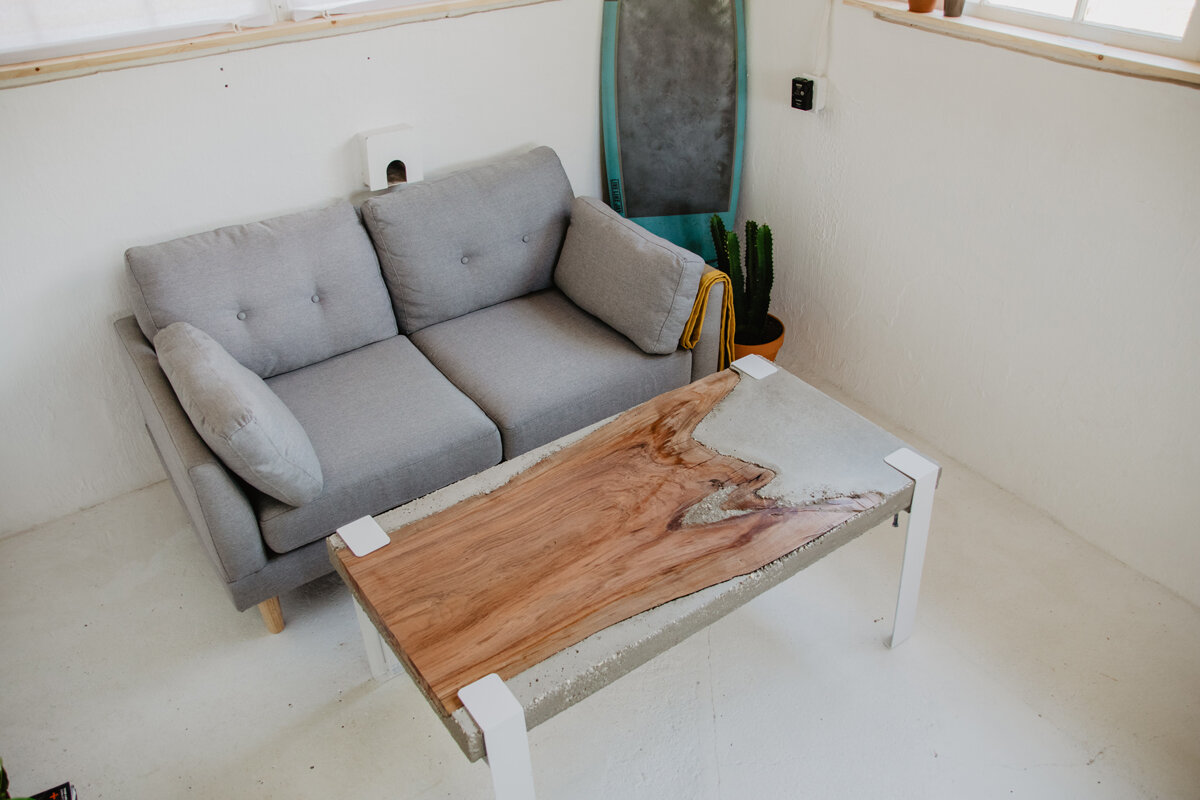
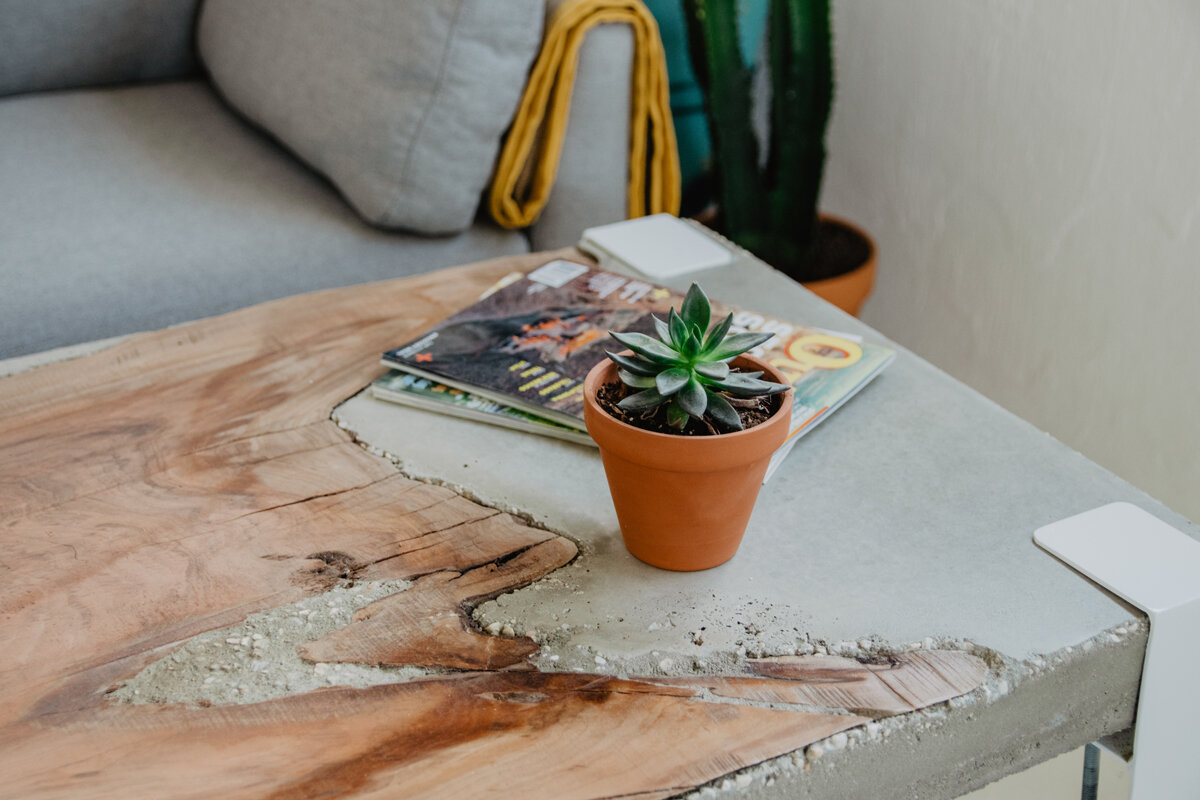
This week we made a coffee table made out of concrete and a cherry slab from downtown Birmingham, AL. This project turned out soo cool and Alex from Mr. Build It did an awesome job with the legs! Praise the Lord that the concrete didn't break on us and everything worked out!
Thanks Homeright for sponsoring this project!
LINKS (affiliate links)
Alex's Channel:https://www.youtube.com/channel/UCziz6FiCnkyQ810X...
Alex's Instagram:https://www.youtube.com/channel/UCziz6FiCnkyQ810X...
Sprayer: https://amzn.to/2KoXj7D
Pop Up Booth: https://amzn.to/2jhsaXl
Orbital Sander: https://amzn.to/2vYIeX1
Belt Sander: https://amzn.to/2rawa05
Best sand paper ever: https://amzn.to/2HC1Ohn
Electric Handplane: https://amzn.to/2vYKYDP
Chisels: https://amzn.to/2HBzJ9W
Other Shop Videos: https://www.youtube.com/playlist?list...
Instagram: (Its popin) https://www.instagram.com/woodbrew_/
STEP 1: Prepare the Live Edge Slab for the Mold

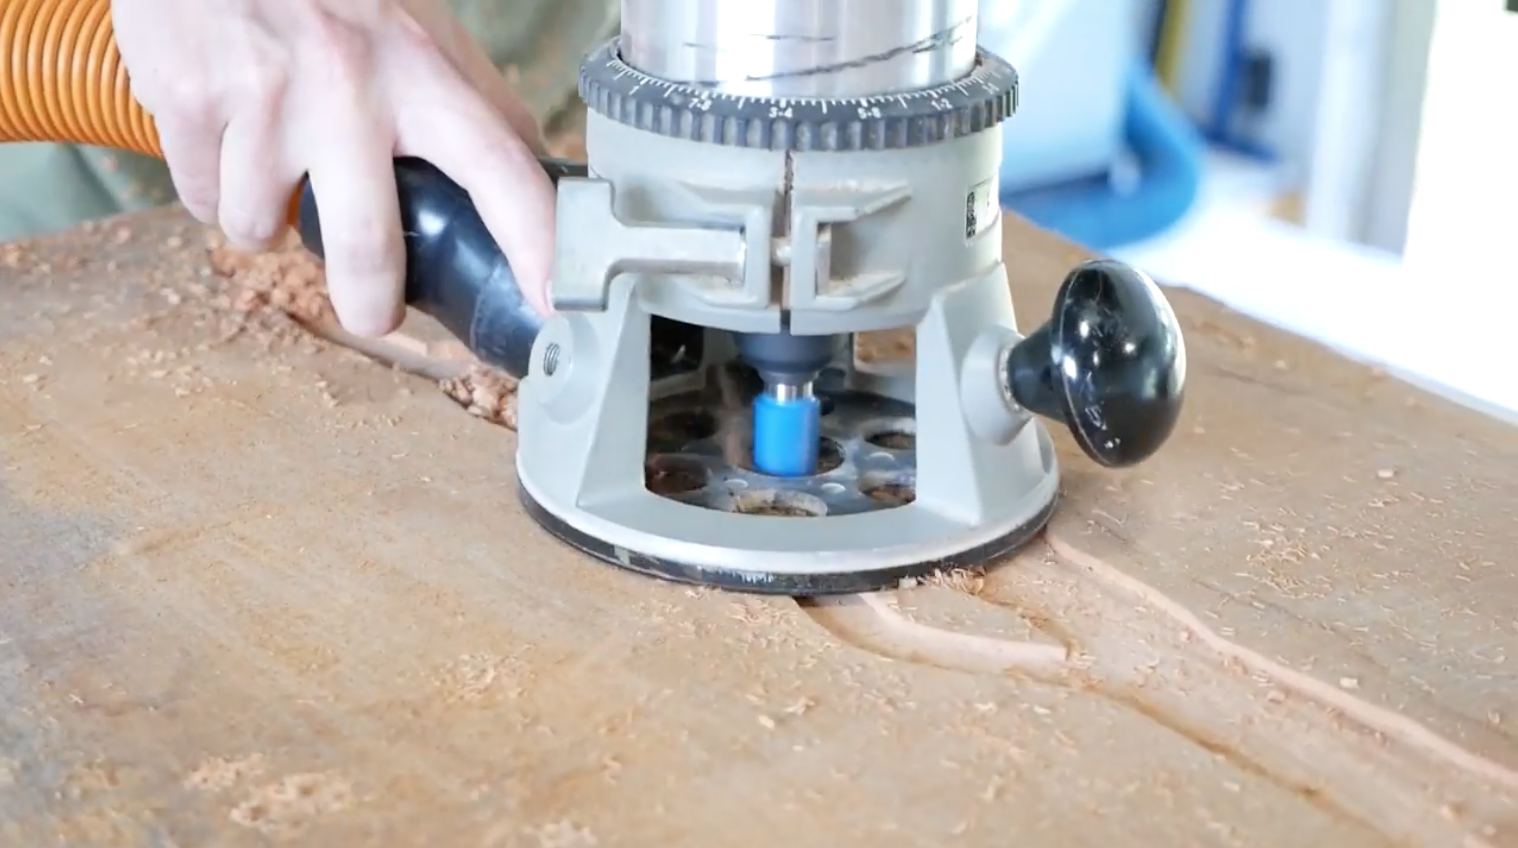
Its important that the top side of your slab is somewhat flat. It doesn't need to be perfect, but the closer to flat it is the better the end result will be.
We are starting with a slab that has cupped and is not even close to being flat...
You have a few options to get the slab flat:
Use a Router and a jig to flatten the top
Use a hand plane (Powered or manual)
Use a belt sander and a lot of time
Use a large piece of machinery to flatten the slab
Or research other methods of flattening
We chose to use a router without a jig to remove the high spot in the middle and then a powered hand plane for the rest.

To finish the slab off we use 120 grit sand paper and a chisel to remove the bark.

Here’s everything we using for this step:
Random Orbital Sander:

DEWALT DWE6423K Variable Speed Random Orbit Sander, 5" (affiliate link)
Belt Sander:

SKIL 7510-01 Sandcat 6 Amp 3-Inch x 18-Inch Belt Sander with Pressure Control (affiliate link)
Sand Paper:

Diablo 5" 180GRIT SANDNET DISCS WITH CONNECTION PAD DND050180H10I (affiliate link)
Electric Handplane:

PORTER-CABLE PC60THP 6-Amp Hand Planer (affiliate link)
Chisel Set:

Irwin Tools Marples Woodworking Chisel Set, 6 Piece, M444SB6N (affiliate link)
Step 2: Making the Concrete Mold
We are using a piece of melamine particle board to give us a smooth top surface. We were lucky and able to use a precut 2ft x 4ft panel.

Our slab wasn't perfectly flat so we decided to use some caulk to seal up the edges. Place the slab with the top facing down onto the piece of melamine and let the caulk dry. We used some scrap 3/4" plywood to make sides for the mold. Our sides were 3 3/4" tall giving us a 3" thick table when you subtract the bottom of the mold. Just screw the side pieces in and you really don't have to caulk them.

Concrete doesn't stick well to wood so we need to make sure they stay together. Screw a bunch of screws into the wood slab and make sure they don't stick above your side pieces. These screws will hold the concrete to the wood and will give strength to the concrete where it over hangs. We also used some wire between screws to bridge long areas.

Step 3: Pouring Concrete Over Live Edge Slab
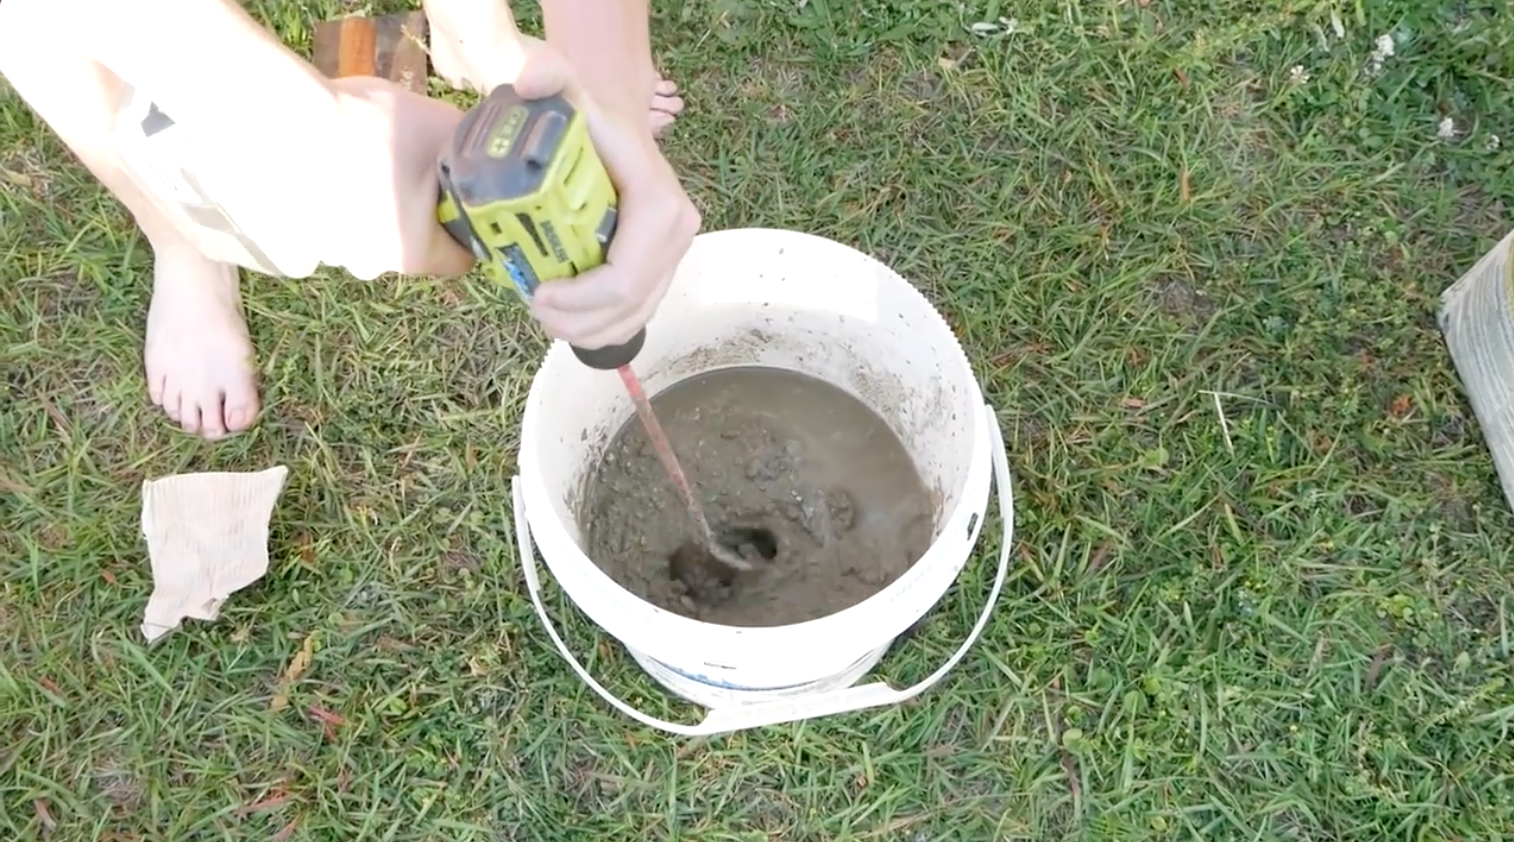
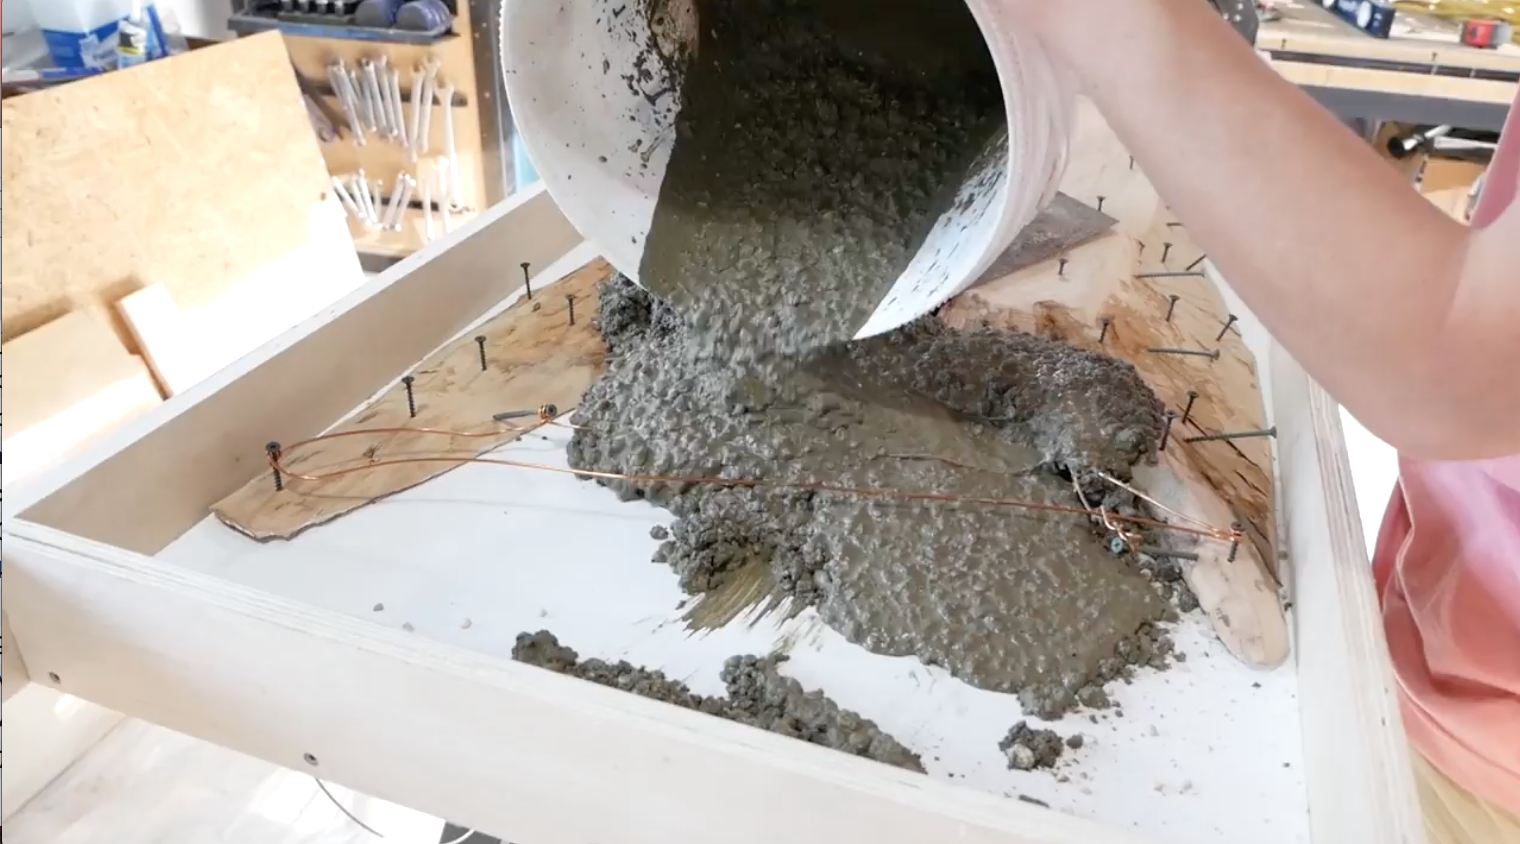
We used two 80lb bags of 5000 psi high strength concrete for this project. You can find it right next to the standard bags at any hardware store. This concrete is stronger and leaves a better surface in our experience. The brand of concrete is irrelevant.
Mix your concrete in small batches to insure your are mixing it thoroughly. If you mix to much at once you risk pouring unmixed concrete into the mold and causing problems. We usually do a slightly wetter first pour and pretty dry pours after that.
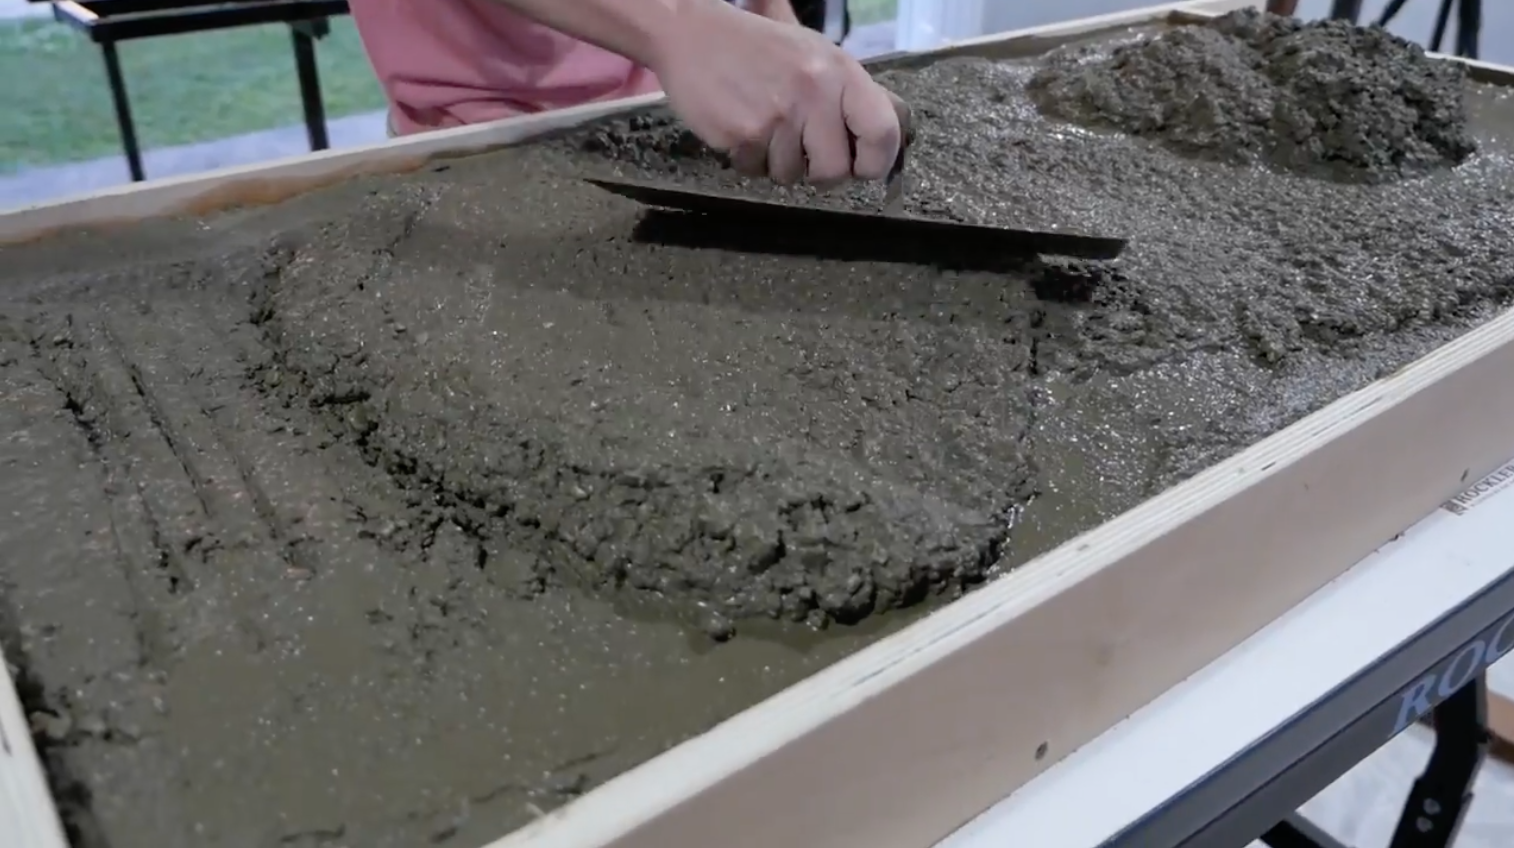
Pour the concrete into the mold and push it into crevasses with a trowel. Use a long board to level the surface out by moving it across the top. This gets messy so be prepared.
Let this cure for at least 72 hrs
Step 4: Finishing the Table

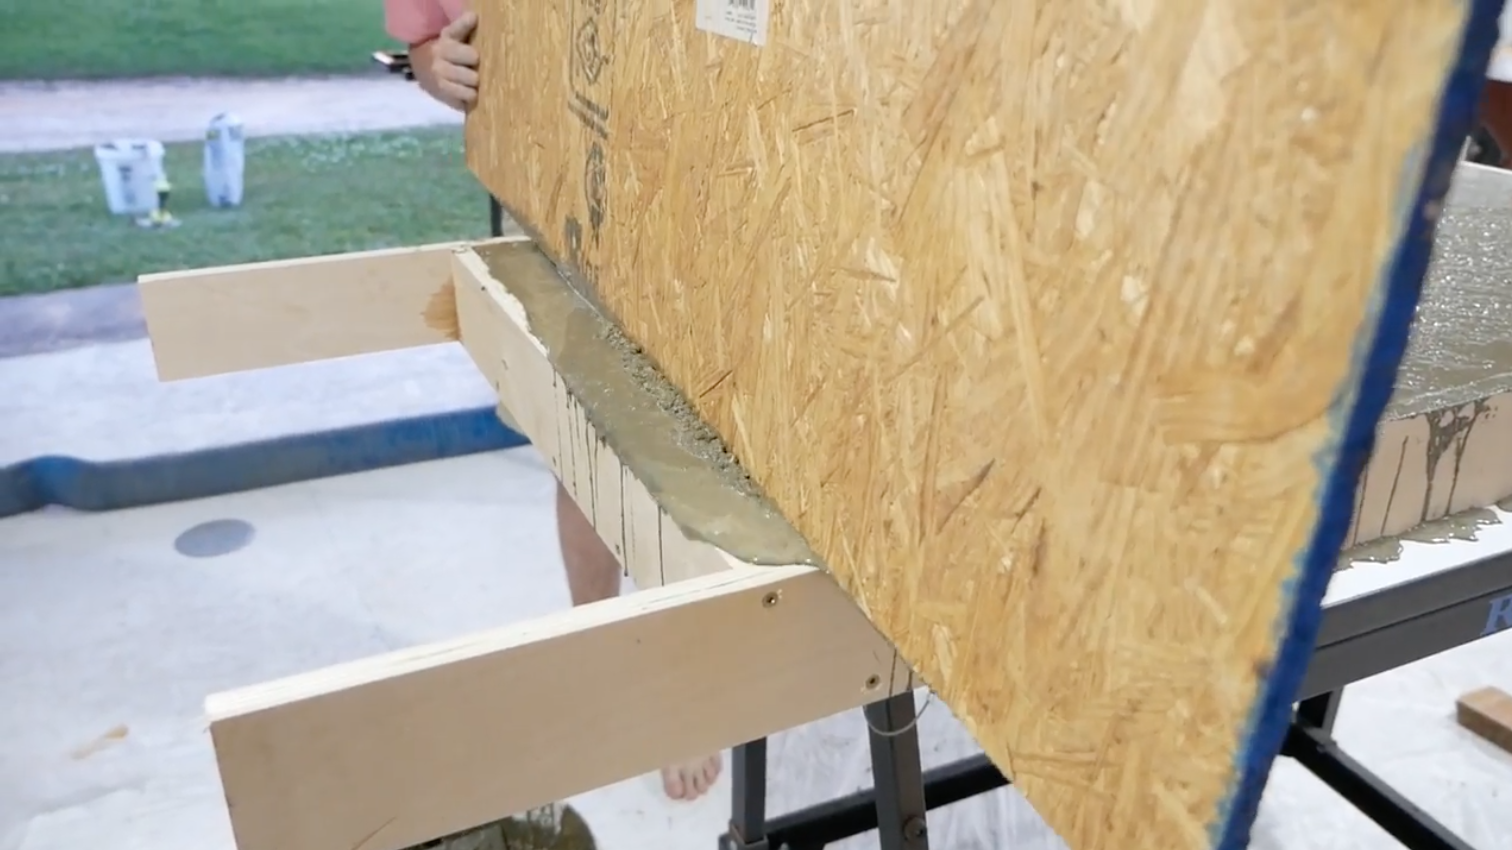
Carefully remove the table from the mold. You may find it still a little damp... if so wait a few more days for it to fully cure.
Sand everything with 120 grit sandpaper and apply a clear coat.
We decided to spray on a water based polyurethane, but pretty much anything will work.

Finish Sprayer:

Home Right C800766 Finish Max Fine Sprayer Blue (affiliate link)
Spray Tent:

Add legs to the table and your done!! We used some legs made by our friend Alex, check out his channel: https://www.youtube.com/channel/UCziz6FiCnkyQ810X7qXFMZw/videos

We hope you enjoyed reading about this project! This one is pretty custom, but if you can get your hands on a nice slab, go and make a coffee table out of it! This one fits into our office perfectly and the cherry color is so beautiful. It’s a nice change from all the natural wood tones we have going on everywhere else.
