DIY Wine Cellar Cabinet
Got wine?
In this weeks video we installed a custom bar cabinet in a client's home. They are building a gorgeous custom home complete with a small, but really cool wine cellar. We absolutely loved the way this cabinet turned out. Its always fun to be able to design a project thats both functional and elegant.
Design
We knew we didn't have much room to work with so the design was crucial. Here was the client's criteria
needs to house an existing wine cooler they had
plenty of wine glass storage
storage for stemless glasses
a lockable area for liquor
a cool countertop
Lets go through each of these items one at a time.
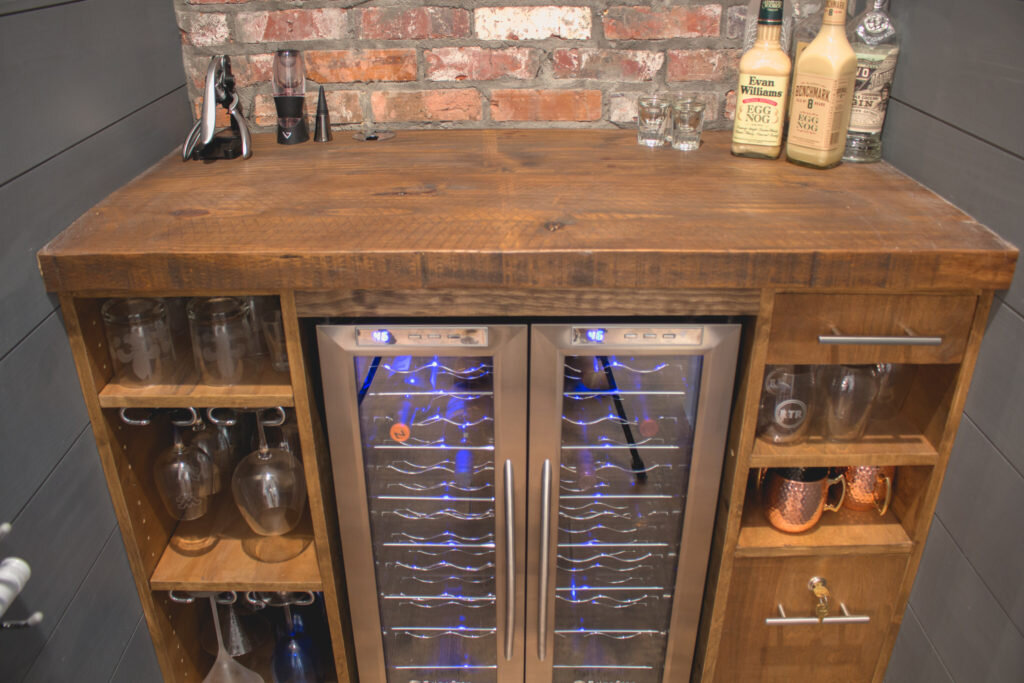
The wine cooler part was easy. We took careful measurements of the cooler and then added 2" to the width of the opening. The extra 2" allowed the cooler to have 1" opening on either side to allow the heat to escape. The height of the cabinet was about 3" taller than the cooler. We added a 2" piece of wood above the cooler to fill the gap and keep the consistent 1" gap around the cooler.
The wine glass storage was accomplished using these cool racks from Rockler (scroll down to the hardware list). These are super easy to install and hold a ton of glasses.

We decided to put each set of wine glass rack on the bottom of moveable shelves. This gave the client the ability to customize the arrangement to best suit their needs. We did this by using shelving pins and a drill guide from Rockler.
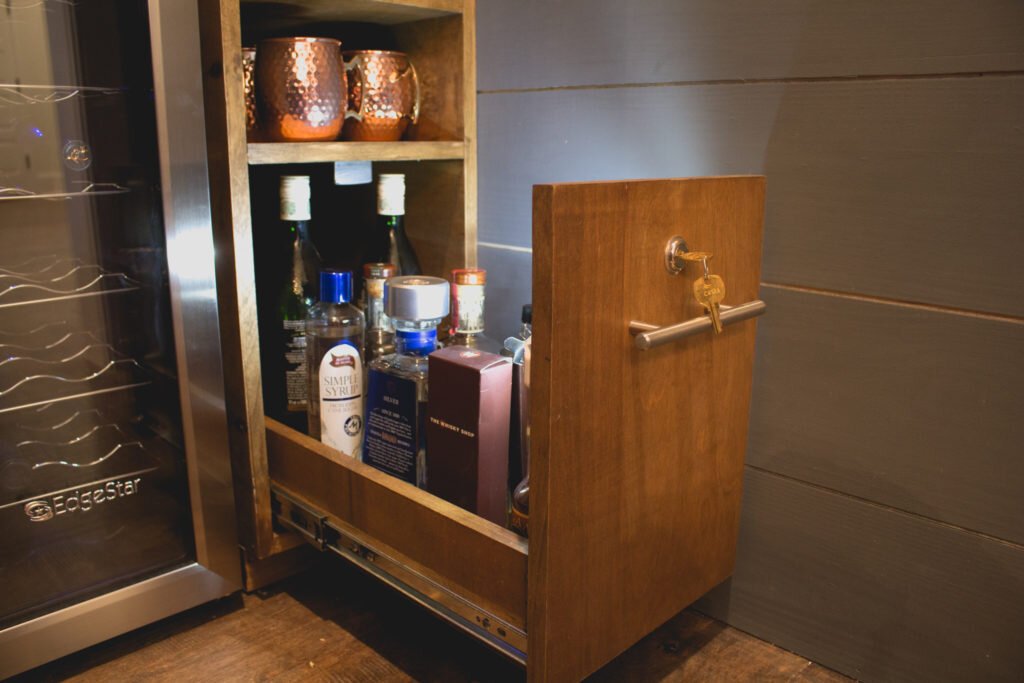
The lockable cabinet took a little while to figure out. We did not want the client to have to dig around in a cabinet to find the bottle they want. This becomes cluttered and not easy to use. We decided to go with a pull out drawer thats locks. This deep drawer allows for all of the bottles to easily be seen and used. We used simple drawer slides and a cabinet lock from Rockler. We also added a motion activated light to illuminate the bottles as the drawers opens.
The countertop was pretty simple. We glued together two pieces of rough cut pine and stained it a dark walnut.
How It’s Made
The construction of the cabinet is very simple. We used a high quality PureBond plywood and a few pieces of pine 1x3. I apologize, but due to this being a built in for our specific needs we will do an overview of how its made. The measurements can be decided by you, the steps are the same though.
We made four side panels from Purebond plywood that measured 24"x 34". We then connected two panels with some 1x2 strips on the top and bottom. The left cabinet had a piece of plywood added to the bottom to act as a shelf and the shelf pins will drilled to accept the remaining shelves. The right cabinet had two permanently fixed shelves attached. The boxes for the two drawers were made then installed. The moveable shelves get the wine glass racks installed and the rest of the hardware is put on. Installing this is really easy. We attached the two cabinet to the wall using screws straight through the side. Then we measured for how big the top needed to be and cut it to fit. The top is attached using screws place in the 1x2s at the top of the panels. Then all thats left is to slide the cooler in and put the drawers back into place.

Hardware And Tools We Used
(affiliate links)
Quad Trimmer With Carbon Steel Blades
JIG IT Shelving Jig and 1/4" Bit Set
Shelf Support, Bracket-Style, Nickel, 1/4" (50)
Rev-A-Shelf - 3450-11SN - 11 in. Satin Nickel Under Cabinet Quad Wine Glass Holder
Rockler Universal Drawer Slide Jig
Drawer Pull JIG IT® Template and Center Punch
1-3/16" Long Cylinder Lock - Nickel, keyed alike