DIY Horizontal Murphy Bed
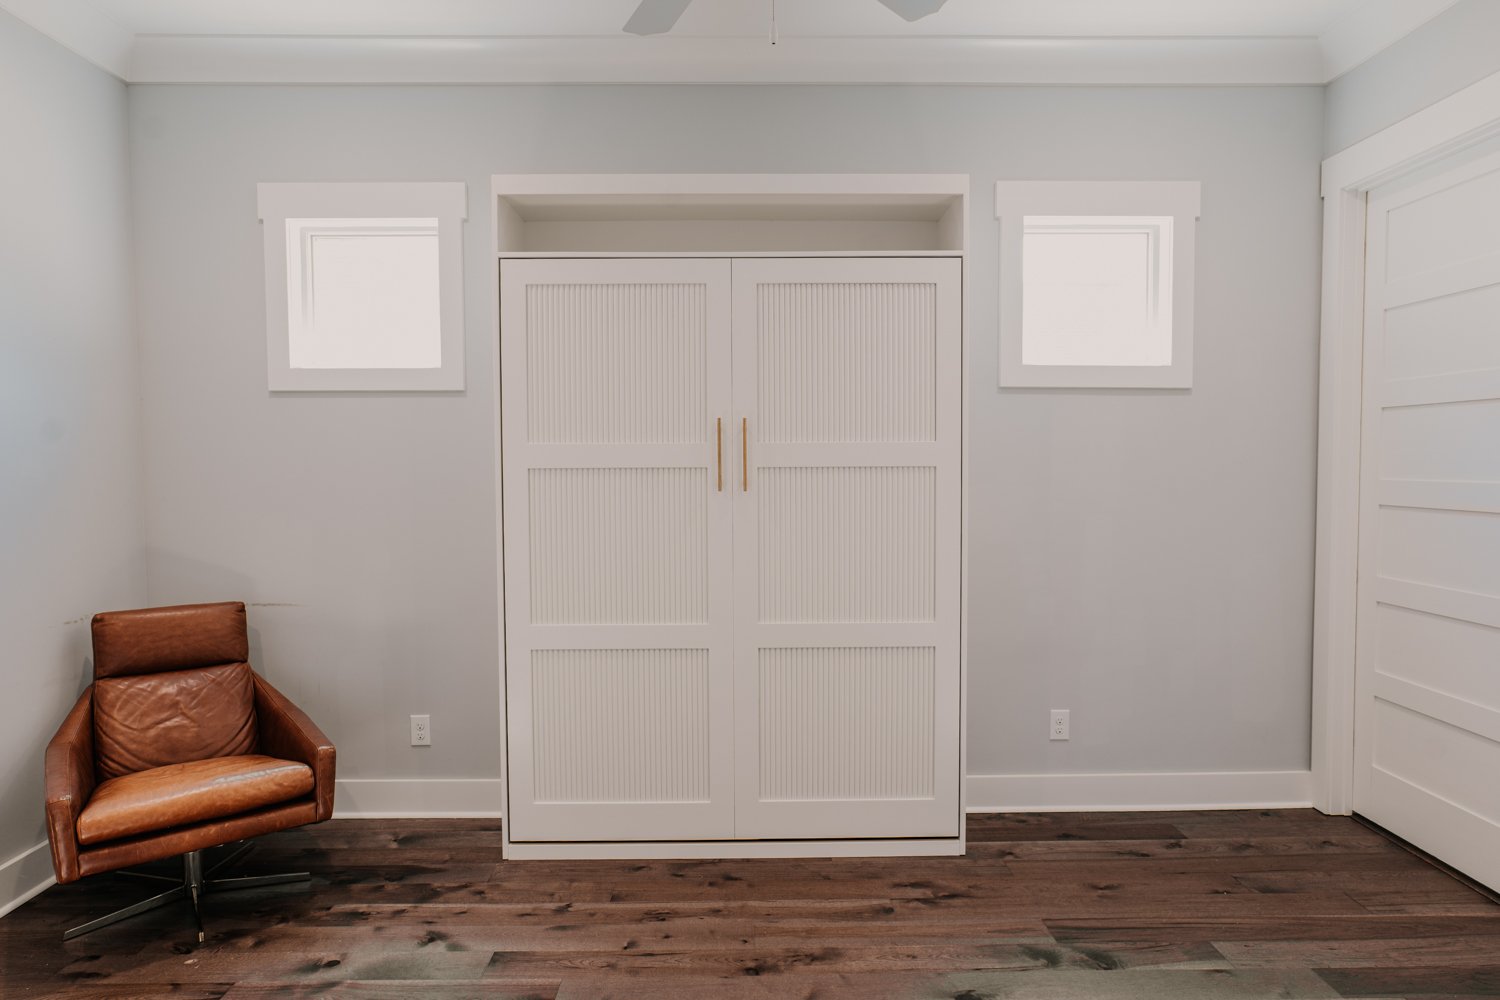
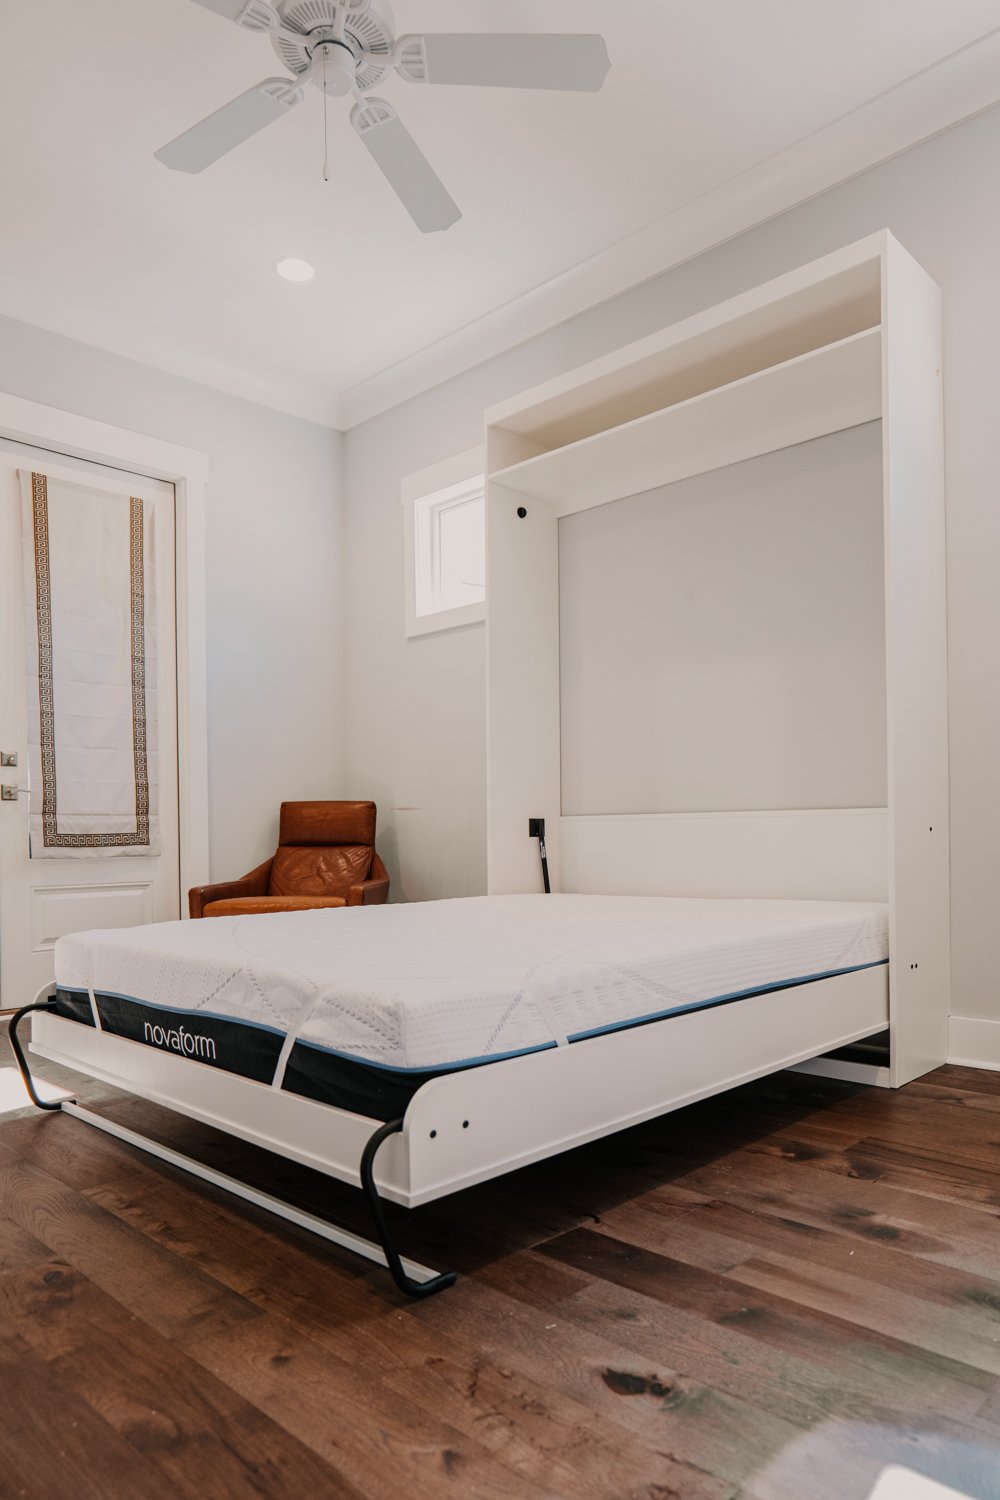
Whether you need extra space in the guest bedroom, or your child needs extra room to play during the day, this horizontal murphy bed could be an excellent solution.Our client is using these beds in a rental condo as an extra bed for each room. They use the cabinet as a place for the TV to sit and as an extra bed that they can easily let the bed fold down. For the most part, this bed is designed to be multi functional and compact, but more importantly it does not degrade your quality of sleep. Most people use an uncomfortable pull out sofa, blow up mattress or a cot for an additional bed. This murphy bed allows you to use a full size mattress and there for its far more comfortable. You defiantly don’t want your mother in-law coming to visit and having to sleep on the sofa…
While, we don’t have plans for this Murphy Bed project (those comes with with hardware: https://amzn.to/3glu0Ft ) you might like some of our other builds that DO have PLANS!
Here is our latest Murphy Bed that we have built! Although it is now horizontal, it is more modern with a lot more detail than the last. If this style of Murphy Bed is more up your ally, we have a 3-part series on building this project.

Materials:
Three Sheets of 3/4″ Plywood: $105 – $150
We used Red Oak PureBond Plywood from HomeDepot.
One sheet of 1/4″ Plywood: $25
Again we went with PureBond plywood.
Ten solid wood 1x2x8: $70
This will give you a couple of extras, but you can always return them if you don’t need them. We used pine 1x2x8 from the big box store. You can use just about any solid wood specie you’d like for this, but pine will more than likely be the cheapest. If you want to stay on a budget, but add strength go with poplar. You could also buy wider boards and rip them on the table saw to save some money. We decided to go with convenience and just buy pre-dimensioned 1x2x8.
Optional: 10′ of your choice of trim: $15
We decided to add trim around the top edge, but not necessary.
(100) 1 1/4″ long screws: $10
As always though you could save a few bucks on a cheaper alternative. We bought a pack of 100 and used about 3/4 of the box. The plans call for three different sizes of screws and finish nails, but we were able to get the job done with just these.
Roughly 75ft of edge banding: $45
We used a 3M peel & stick product that Rockler sells. It is slightly more expensive, but you don’t need an iron to apply it. As always there are less expensive routes. Click the photo to see more.
Wood glue: $5
We highly recommend you check out this applicator set by Rockler… It is amazing. Rockler Glue Applicator Set
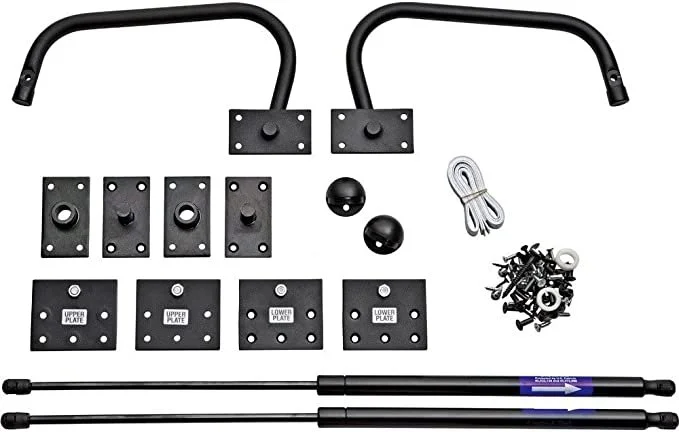
Murphy bed hardware: $300
We can’t speak for any other hardware kit, but we do highly recommend this kit. This kit comes in several different sizes, we used the twin size, but more importantly it comes with a set of written plans and an instructional DVD. This kit is also available in the vertical orientation.
Total Cost= $620
WOW Thats Expensive! Well, hold your horses…. even Ikea murphy beds aren’t cheap. I did a little research, and your average particle board murphy bed, which requires a degree in astrophysics to assemble, costs well over $1,000. If you decided to buy a murphy bed built from solid materials like this one, you better make sure those depends are on nice and snug, you’d be spending upwards of 3-4 GRAND.
Tools Needed:
Now that your depends are nice and full, let’s move on to what tools you’ll need to get the job done.
Here are the bare minimum tools
I recommend getting this set, it’s cheap and works great. The second drill is an impact and works really well for driving screws. I like this kit deal because you basically get the impact for free.
This set from Rockler comes with everything you’ll ever need. Click the photo to see the details.
1″ & 5/8″ Forstner Drill Bit
Or you can buy this set to have all you’ll need Freud 7 Pcs. Precision Shear Precision Shear Forstner Drill Bit Set (PB-107B) (affiliate link)
1/8″, 1/4″, 5/16″ Twist drill bit
This set is a good buy. DEWALT DW1361 Titanium Pilot Point Drill Bit Set, 21-Piece
Some form of saw. If you have no saws I would recommend just buying a circular saw. If you aren’t sure you can make a semi-straight cut, I provided a link to a great guide that helps you cut straight. We use the Makita track saw. This saw is expensive, but it will make quick work on most projects.
Here’s that guide that will help you cut more accurately. http://amzn.to/2eVtpat
Other saws that would make life easier would be a table saw and miter saw. Here are two great options if you are just getting into woodworking.
Jigsaw or a coping saw.
Jigsaw is more expensive, but I guarantee you’ll use it more than you’d expect.
Clamps (not necessary but I would recommend watching our video and seeing where we use them to decide if you need them)
Here are the ones we used in the video.
The last tools you’ll need are:
Tape measure
Hammer
speed square and a framing square will help
A household iron if you buy non-peel and stick edge banding.
This is normally where you’d scroll through about a gazillion steps on how to make this bed, but….
I am going to save myself the other half of this week by just suggesting you buy the hardware that comes with the already written-out plans.
WAIT!
I know you your kicking and screaming asking yourself why you just read this entire article only to find out that you have to go buy the hardware to even find out if you’re capable of building this thing. So… I guess I’ll cancel that 8 am yoga and show you how it’s done… or at least an overview.
Step 1: Cut plywood sheets to their dimensions.
The first thing we did was to cut our sheets of plywood into their final dimensions. We used a track saw here, but whatever you use these plans make it very easy. The plans come with a Keyed diagram that shows you how to lay out each of the parts on your plywood. All you have to do is refer to the cut list for the exact measurements. Here are some photos of the plans.

Step 2: Cut all solid wood material
The second thing we did was to go ahead and cut all of our solid wood material. We used Pine 1x2x8 and cut them on the miter saw. Look for “Solid*” on the plans to see which parts need to be solid wood.
Step 3: Drill out holes for mounting hardware
We went ahead and laid out all of our hardware mounting locations. These are very well covered in the set of plans and were fairly easy to do. I would defiantly take your time on this step. The majority of the holes need to be drilled on Parts G (Verticals) and Parts B (side rails). The photo below shows how the plans provide a template for all the hard parts.
Step 4: Edgeband the Plywood
After all of the holes were drilled and the side rails had the radius cut on them, we moved on to edge banding everything. There are many parts that need edge banding, so we decided to go ahead and do all of them at once. Throughout the plans there are “F”s with an arrow pointing to “finished” edges. This lets you know what edges need to be edge banded. I highly recommend you get one of these before this project… trimming 75ft of edge banding is worse than coming home to an empty refrigerator. Click the photo to see how sweet this little gizmo is.

Quad Trimmer With Carbon Steel Blades
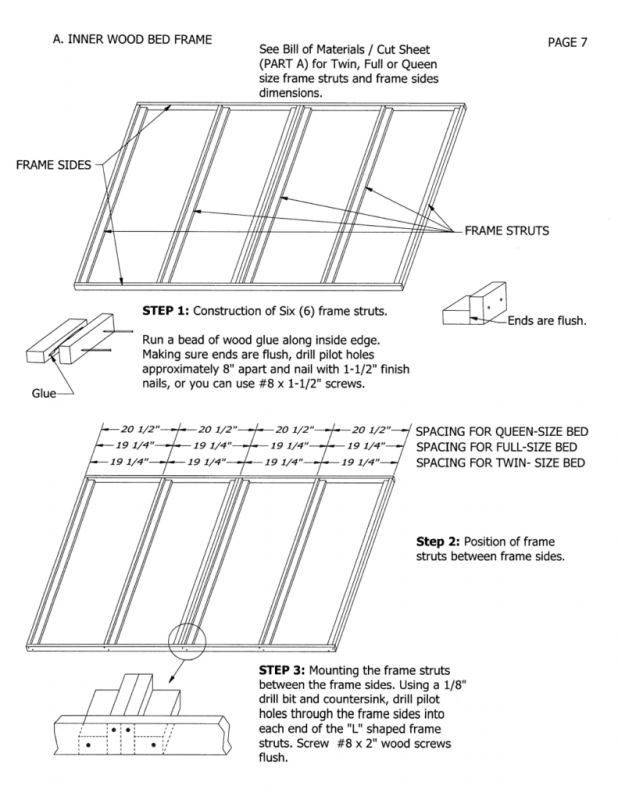
Step 5: Assemble all cut parts
Time for assembly. We started by creating the frame for the mattress to sit on. This is a really simple process. All you do is make several L-shaped pieces and attach them to two longer stretchers. I would recommend pre-drilling these holes because you may split the wood.
Step 6: Stain or paint and add a finish
We finished assembling the bed portion by attaching the side, front, and back rails to the frame. Before going any further we decided to apply a finish to everything. We went with a weathered grey stain and a clear lacquer top coat. We highly, highly recommend the Wagner Flexio sprayer for this project and really, most projects!

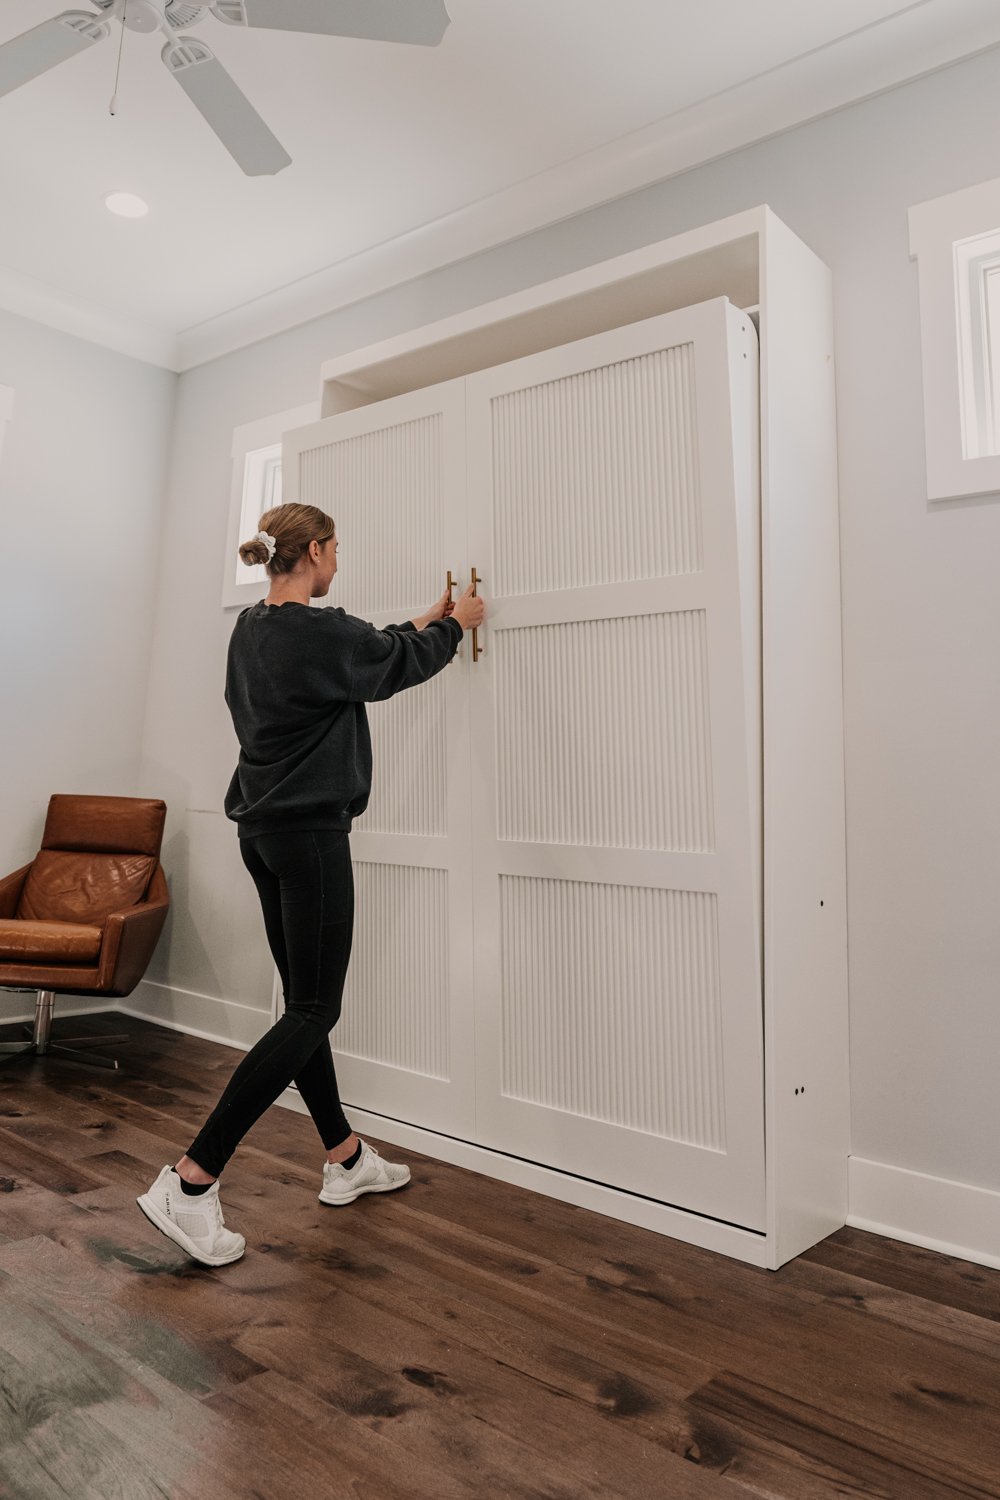
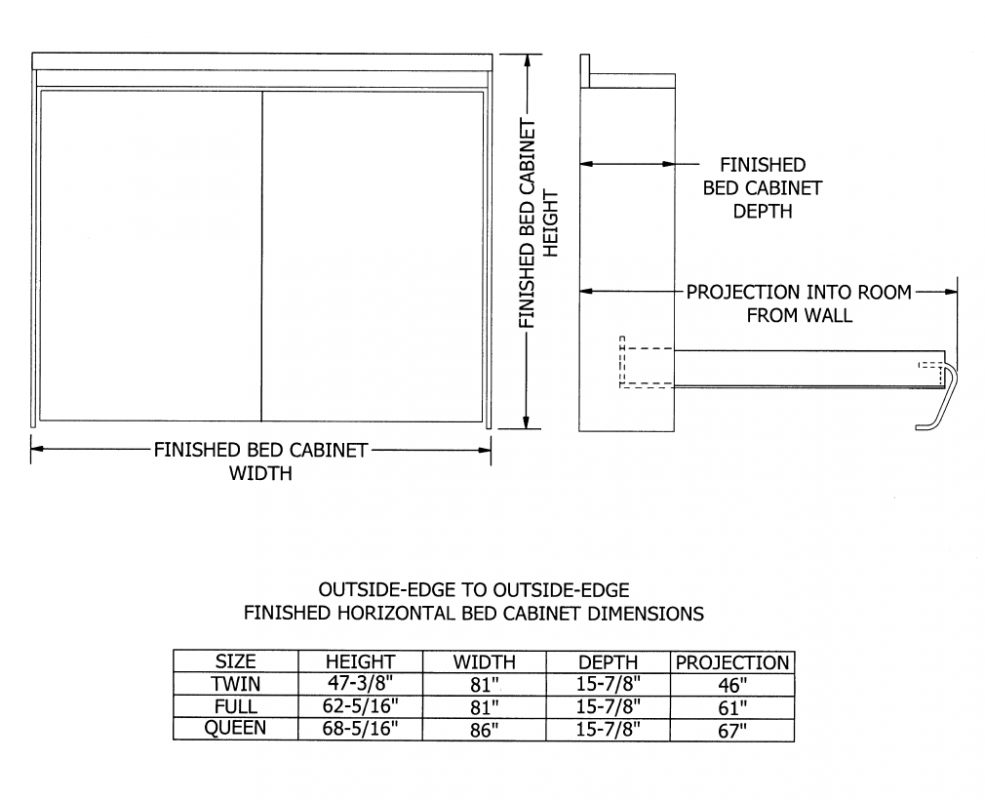
Step 7: Attach the bed cabinet to the wall
The final step was attaching the bed cabinet to the wall and join the bed to the cabinet. There is an entire booklet that comes with the plans on how to do this. This is a fairly simple process, but due to some changes in design, ours was slightly more difficult. I’ll go over this later. The main point I want to make here is that make sure you fasten the bed really well to the wall. We defiantly don’t want cranky old aunt betty being folded up inside this thing…
What changes did we make?
So there are a few changes we made and most of which are visual. Now I do want to mention that the plans specifically say “do not build this in any other way”…. so you decide if you want to make any changes.
The first aesthetic change we made was making the front panel all one piece. That is part “E” on the cut diagram. The reason we did this was that we wanted the front to look like shiplap and not have a seam down the middle. The reason the seam is there is that many of the other designs use it to make the bed look like a cabinet. Here is a look at the plans suggested designs.

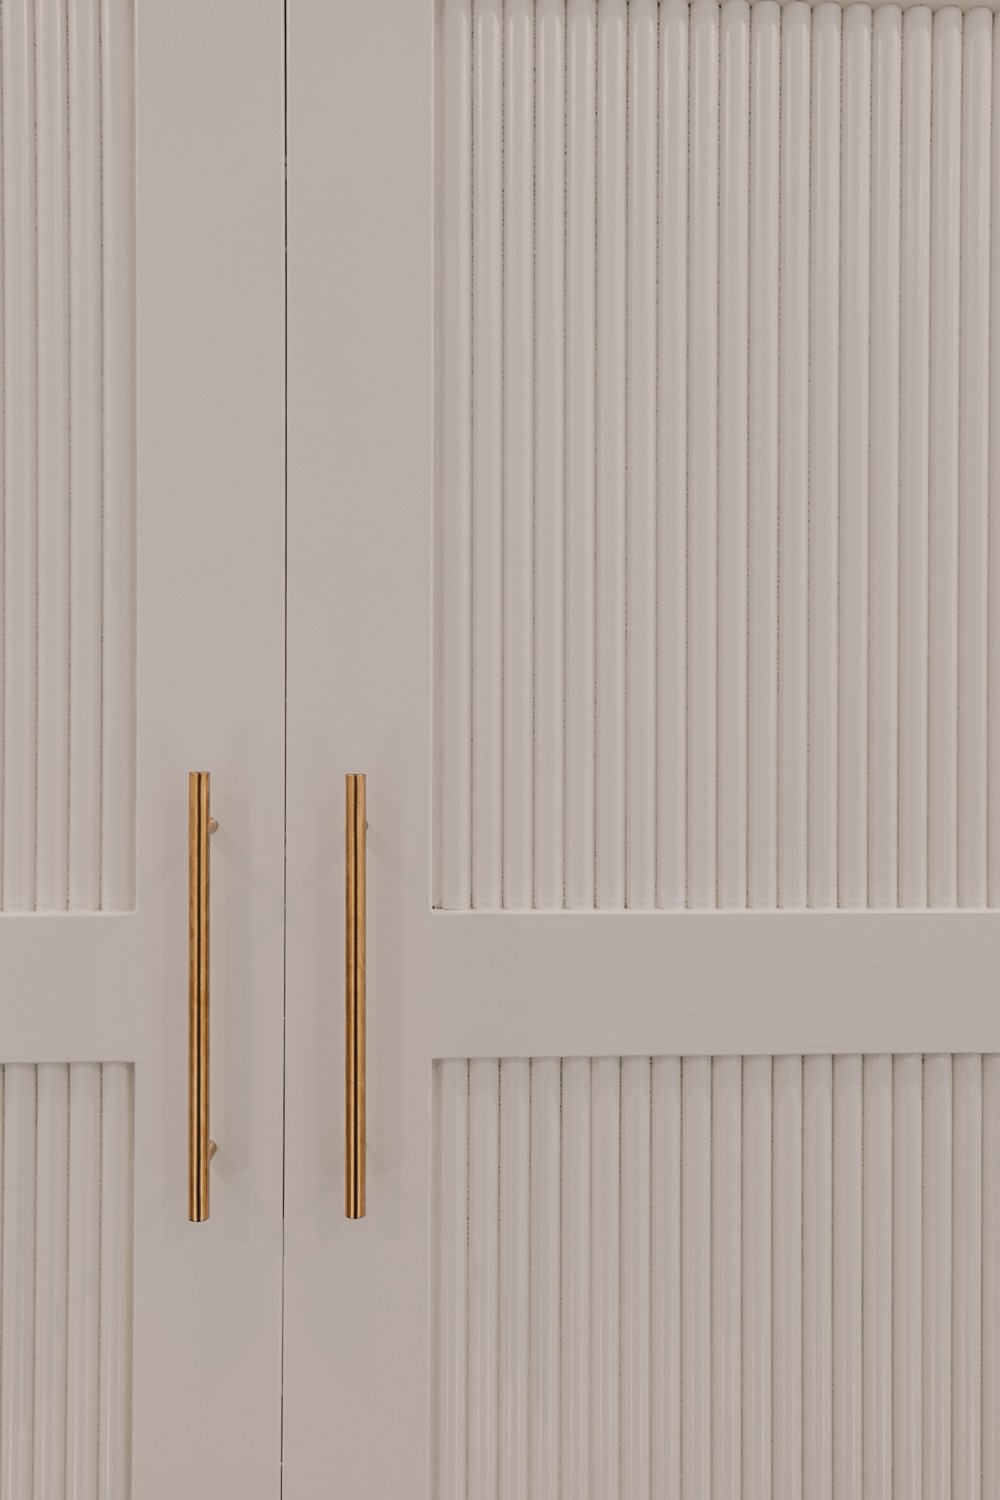
How to Create the ShipLap Effect
The shiplap effect is quite simple and very easy to do, in fact, we use it very often. Basically, all you have to do is set your depth of cut on your track saw, circular saw, router, or table saw somewhere around 1/8″ – 1/4″ deep and make a cut across the length of the board. We did this on the front of the bed, as well as the side vertical pieces. This photo better illustrates this.

The next change we made was making the entire back of the cabinet, part “F”, a sheet of 3/4 plywood. We also did the shiplap effect on this panel. This in theory is a great upgrade. It adds tons of strength, needed for when your odd extended family comes in town to visit… and it just cleans up the inside and doesn’t allow the wall to be seen. The major drawback to this is when it comes time for assembly. The gas spring needs to be added while the bed is closed, which means the back has to come off. This isn’t the end of the world, but it does make the bed a bit flimsy until the back is reinstalled. We just used pocket holes on the back side to attach this panel and used the panel to secure the bed to the wall. Again though, I would contact the hardware manufacturer if you have doubts about this method before using it.
The final aesthetic change was adding a simple piece of trim around the top. This was simple but really made the bed feel more like a nice piece of furniture.
Final Thoughts
This is one of those projects that seems really daunting, but when you go step by step its really pretty simple. It’s also a project that you and many others will admire. Any time you build something with a cool mechanism you automatically look like a genius to your best mates. It is also a project that will actually be functional and used for more than one season.
More than anything you will learn so many useful skills along the way.
I hope this article helped with any questions you may have while building this particular murphy bed, or any other kind. If you do decide to take on this project, make sure to take some pictures of the finished piece and tag us or hashtag us on Instagram!


